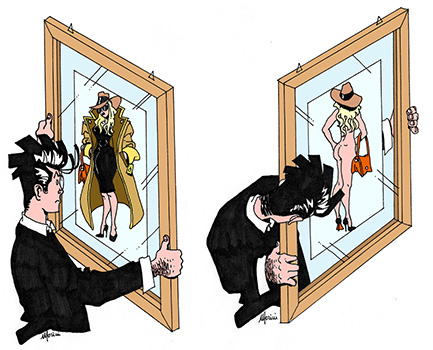
It is a rather simple technique that is necessary if you want to view the back of pictures or if you want to emphasize the isolation of the picture from the frame.
Framing with double glass is fairly common. It is particularly suitable for pictures that have jagged edges like Egyptian papyrus, Indian leaves, Mexican bark or even for certain antique documents that have worn out edges: it is also useful when both sides of a picture or object want to be looked at. As for example certain documents, letters, bank notes, works of art etc. where the back of them might include dedications, annotations etc. Another pleasant situation creates itself with double glass framing. The back wall, on which the frame is hung, appears to be the mountboard and can give a pleasant effect.
Generally, pictures that are framed with double glass are very thin; they are usually made from paper, paperboard, cloth, etc. Sometimes though, the client requests double glass framing for items that are reasonably thick such as heavy cloth, diplomas together with medals, etc. These cases create specific problems that we will look at later on. Other times the client can ask for double glass framing for pictures of huge dimensions. In these cases the double glass frame is not advisable as the chances of the glass breaking are far too high.
Double glass framing is generally fairly simple and doesn't create too many problems. One must be careful though at certain particulars that we will now analyse in detail.
It should be strong enough to maintain both the picture and the double glass. It is necessary to consider 2 things:
• Two panels of glass weigh more than one and hence the weight to be sustained is obviously greater than that of a normal frame with a single panel of glass.
• The frame cannot be reinforced in the usual ways a single glass panel frame is reinforced. Glass is a difficult material to attach to the frame. The only way is to secure the panels to the frame with silicon but this makes it extremely difficult to eventually remove the picture and/or change the glass in the case of cracking.
In 2 big glasses frames size is better to apply two hangers
instead of 1, to prevent the face weight embark the high side.
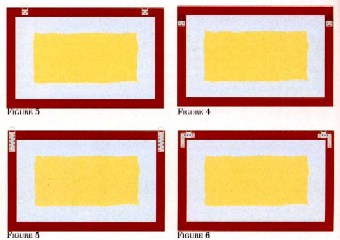
Shown here are four examples.
The thickness of the moulding must be in proportion to the size of the picture. It is necessary to also consider the type of wood used for the frame. If the wood used is a hard type of wood, then it is not necessary to have a thick frame; though if a soft type of wood is used such as ajous, then the thickness must be greater. For example a hard wood frame of 50 x 70 cm (20" x 28") should have a width of at least 2 cm (4/5"). If the frame is made from ayous, then the thickness should be about 2.5 cm to 3 cm (1" to 1 1/5").
In any case, if the picture is of certain dimensions, it is necessary to put two hangers at the extreme points of the top border of the frame, instead of just one in the centre. This is done so that the top part of the frame does not warp as a result of the weight of the double glass. It is preferable in these cases to use trapezoidal hangers that are able to tolerate a greater distance between the two hangers on the frame.
If the two hangers are to remain non visible then they should be fitted to the upper part of the two vertical sides of the frame (figure 10). It is advisable to use hangers with more than one hole as shown in the figure. These hangers are in fact fitted to the two vertical sides of the frame and hence give a greater guarantee of stability.
The assembling of the 4 sides should be particularly solid for large frames. Use either wedges or glue. In some cases even reinforcing squares are useful. These are placed around the corners of the frame.
The moulding should not be too deep. If this is the case the internal part of the moulding, which is usually in plain wood, remains visible through the glass and this is not always aesthetically pleasant. If deep mouldings are used it would be advisable to finish this internal visible part of the moulding with either varnish or coloured adhesive tape.
After having cleaned the two panels of glass pictures or objects, framed with double glass, are generally placed in the middle of the panel of glass so that there is a margin of space left in between the picture and the frame leaving the back wall visible through the glass.
How is the exact central positioning achieved? In most cases by just using your best judgement especially when the picture has a particularly irregular shape. If a more exact positioning is desired then a more methodical method is required.
It is not always possible to use double sided adhesive tape for securing the picture to the glass. For pictures that are substantially heavy it might be necessary to use a few drops of silicon, but never before obtaining the clients prior approval. Silicon can be quite easily removed in case the need arises of wanting to detach the picture.
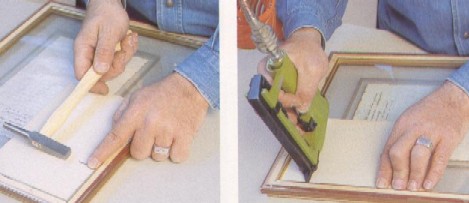
Photo 10 (left)
In order to secure the glass stop it is possible to use steel nails. If they are too long then it is possible to bend them with a hammer.
Photo 11 (right)
Pins being applied with an air gun
In some cases double sided adhesive tape creates some aesthetic problems. If the picture is to be looked at from the back then the double sided adhesive tape is in fact not a pleasing sight. As it is not possible to resolve this problem in any other way we should place the tape in a position where it is not too unpleasant to look at. We will position the tape in either a horizontal or vertical position but never obliquely. Also we should place it in parts of the picture where it is not covering text or images. Irrespective, when using double sided adhesive tape on documents it is first necessary to get the client's authorisation.
The use of double sided adhesive tape is a technique that is not allowed in conservation framing as the adhesive alters paper. It would be useful to use neutral adhesive tape such as Filmoplast (that can be removed by wetting).
It must also noted that the whole double glass framing procedure is not a recommended conservative framing technique and hence should not be used if wanting to frame high valued art or historical documents in time.
Spacers (or glass stoppers) can be used in order to secure the two panels of glass to the frame. It is advisable that the finish of the spacers be the same as that of the frame. If for example the frame is gilded then the spacer should also be gilded. There are both wooden or plastic spacers available on the market. In order to secure the spacer to the frame, small nails with very small heads should be used so that they are the least visible as possible. It would be even better to use headless nails fired from a air gun. Whilst the heads are being fired just be careful not to break the glass. Also whilst the nails are being inserted it would be advisable to protect the glass with a cardboard cut off. The hammer (or air gun) could then be leant against the cardboard (figure 11).
The spacer could also be secured using glue but this then makes it difficult to eventually open the frame when and if the occasion arises (e.g: if the glass needs to be cleaned or broken glass needs to be changed). There are plastic material spacers available on the market with a gilded adhesive side covered with release paper. In this case the release paper is removed and the spacer is stuck to the head of the frame.
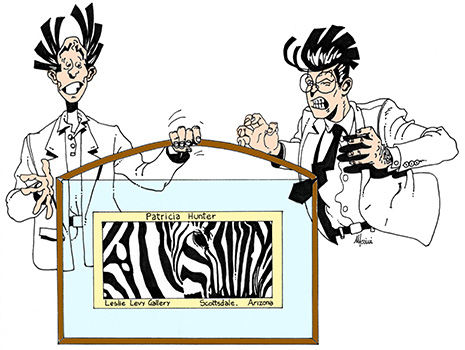
One small piece of advice: it would be preferable to wrap the completed frame in white wrapping paper. When the packing is unwrapped in front of the client the white paper has a better aesthetic effect as it can clearly be seen through the glass. Also small particles of dust, that are difficult for the framer to avoid, are less easily noticeable on a white background.

Figure 12
Some examples of how the mountboard can be used in double glass framing
1.Glass stopper 2.Picture 3.Glass
4.Paperboard 5.Bevelled mountboard 6.Paperboard fillet
It is obviously necessary to make endless recommendations to the client on how to handle the frame reminding him particularly that a double glass frame is more easily subject to breaking if it is not carefully handled. In particular it is necessary to grab the frame from its base and not from its side. If the frame is lifted from one side for example it could come out of place especially if it is a reasonably big frame.
If the thickness of the glass is excessive it is necessary to insert a small spacer between the two panels of glass. The spacer could be made up of a thin strip of cardboard or paperboard secured to the glass with silicon. In this case the pressure of one panel of glass against the other would no longer exist. As it was this pressure that was keeping the picture in place it is then necessary to think of another way to secure the picture especially if it is a heavy one. A few drops of silicon, in these cases, is probably the only solution.
A thin piece of paperboard (0.5 mm) could be used instead of the spacer. If greater thickness is required then a bevelled mountboard or even a double bevelled mountboard could be used. The mountboard could be decorated in many ways (figure 12).
It is also possible to adopt other more original solutions like increasing the distance between the two panels of glass and instead of securing the picture to the back panel of glass it is suspended on a hanger that is secured to the glass with silicon. The picture would then give the impression of being suspended in mid air.
Plastic glass (polystyrene, plexiglas or others) could be used instead of glass. This would be useful when there are high possibilities of the glass breaking and when holes need to be drilled into the glass in order to apply screws, etc. Another solution could be to use plastic glass for the back panel and normal glass for the front.
The worst aspect of double glass frames is that the back of the frame is not pleasant to look at because the moulding is in its natural state. The solution could be to apply various finishes: walnut mordent could used to darken the moulding or liquid varnish to gild it (there are many colours of gold and silver available on the market). Even the use of gilding cream would give a pleasant effect.